
| Project Aspect | Details |
| Total Time | 4 – 6 Hours (Active Build Time) |
| Estimated Cost | $60 – $85 (Lumber & Hardware) |
| Required Tools | Miter Saw, Drill/Driver, Pocket Hole Jig, Sander |
| Difficulty Level | Beginner Friendly |
There is a distinct, undeniable magic that happens the moment a rough piece of construction lumber transforms under your hands. Wood is a living, breathing material with a soul and a story, and when you cut into it, you are continuing that narrative. If you have been intimidated by the thought of building your own outdoor furniture, let me stop you right there. You absolutely have the capability to build something beautiful, sturdy, and lasting for your backyard.
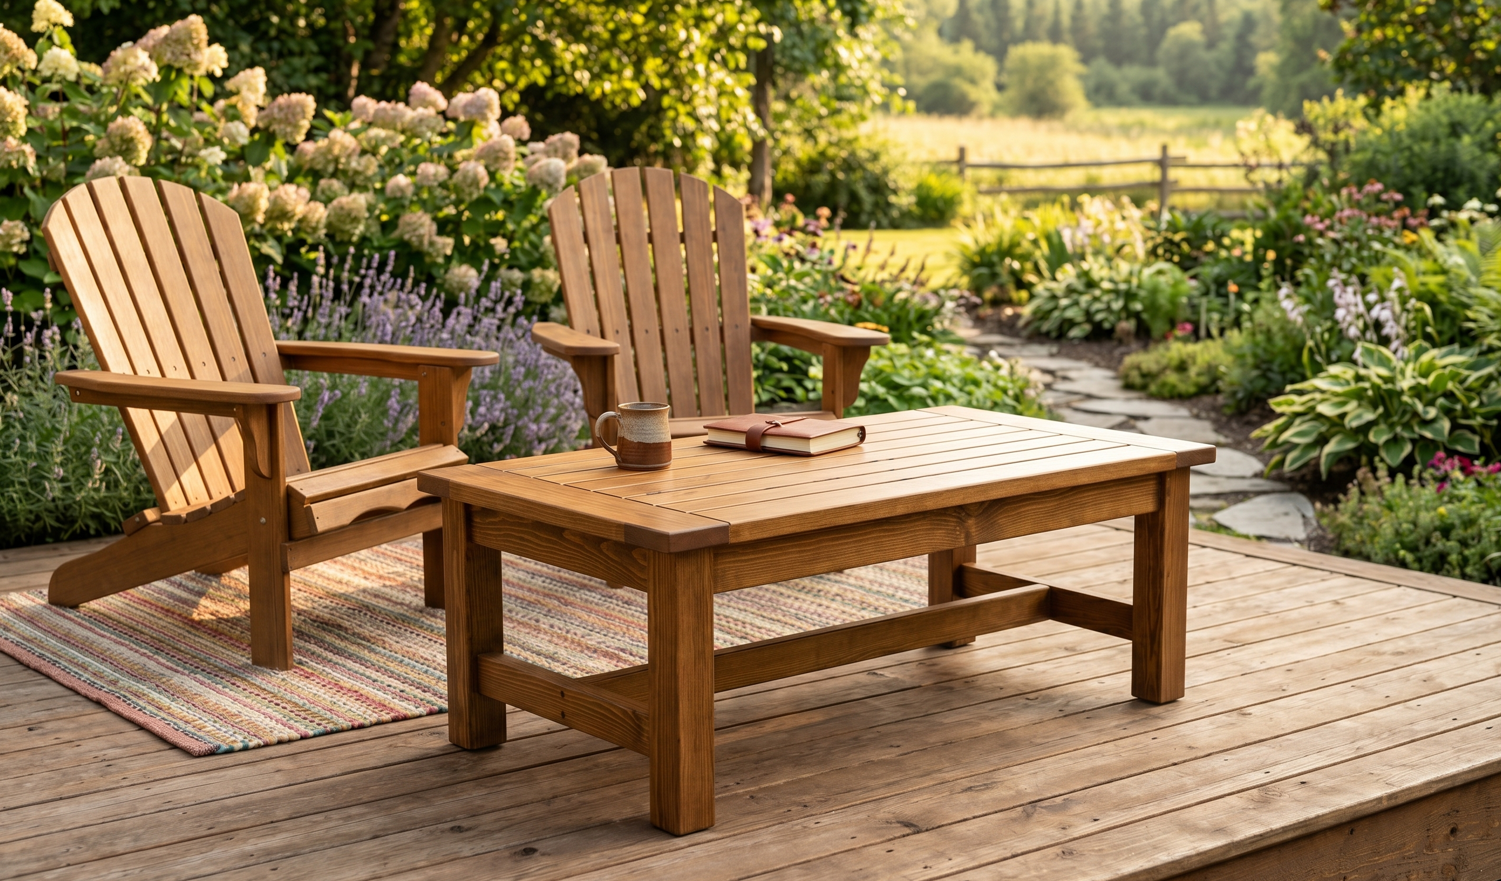
This Easy DIY Farmhouse Outdoor Coffee Table is designed specifically to get you into the shop and making sawdust without the overwhelming complexity of advanced joinery. We are utilizing standard dimensional lumber right off the rack at your local home center, straightforward cuts, and an assembly method that guarantees square, rock-solid results. Whether you are setting down a morning cup of coffee on the patio or kicking your feet up around the fire pit, this table will serve your family for years. Grab your safety glasses, and let’s dive into the build.
The Shopping List
For this project, we are sourcing standard US dimensional pine or fir. If your budget allows, cedar is fantastic for the outdoors, but standard construction-grade lumber works perfectly if properly sealed.
Lumber:
- (1) 4×4 Post @ 8-foot length (Avoid treated lumber if you want a smooth, dry finish)
- (3) 2×4 Boards @ 8-foot length
- (4) 2×6 Boards @ 8-foot length
Tools & Hardware:
- 12″ Compound Miter Saw
- Cordless Drill and Impact Driver Combo
- Kreg Pocket Hole Jig (K4 or 720Pro recommended)
- Random Orbital Sander (with 80, 120, and 220 grit discs)
- 2 1/2″ Exterior-Grade Pocket Hole Screws (Blue-Kote or Stainless)
- 2 1/2″ Exterior Deck Screws
- Exterior Grade Wood Glue (Titebond III)
- Figure-8 Tabletop Fasteners
The Cut List
Precision at the miter saw makes assembly a breeze. Measure twice, cut once, and remember that the saw blade removes about 1/8″ of material (the kerf) with every cut.
Base Components:
- Legs: 4 @ 4×4 @ 16 1/2″
- Long Aprons: 2 @ 2×4 @ 39″
- Short Aprons: 2 @ 2×4 @ 18″
- Center Supports: 3 @ 2×4 @ 18″
Tabletop Components:
- Main Planks: 5 @ 2×6 @ 48″
- Breadboard Ends: 2 @ 2×6 @ 27 1/2″
The Step-by-Step Build
Step 1: Cutting and Prepping the Base Components
Begin by setting up a stop block at your miter station to ensure all four 4×4 legs are cut to the exact same 16 1/2″ length. Even a 1/16″ discrepancy will cause the table to rock. Once the legs are cut, move on to the 2×4 aprons and supports. After all base components are cut to size, drill two 1 1/2″ pocket holes into both ends of every apron and center support piece.
When we source dimensional lumber from a big-box store, we are often dealing with wood that has a surprisingly high moisture content, sometimes resting between 15% and 19%. Construction lumber is kiln-dried fast and furiously, leading to a phenomenon known as case hardening, where the outer fibers dry and shrink around a wet, swollen core. By bringing this wood into your shop and letting it acclimate for a week before cutting, you allow the moisture gradient to equalize. If you cut immediately, the rapid release of internal tension can cause severe bowing and twisting along the longitudinal axis. Furthermore, when utilizing a miter saw for cross-cutting, you are severing the tracheids (the cellular “straws” running the length of the board). A sharp, high-tooth-count blade minimizes tear-out by slicing these fibers cleanly rather than crushing them, ensuring maximum surface contact for your eventual joinery.
Step 2: Assembling the Leg and Apron Base
Place two legs flat on your workbench. Position a short (18″) apron between them, setting the apron back 1/4″ from the outside face of the legs to create a shadow line. Apply a generous bead of exterior wood glue, clamp the pieces tightly to prevent shifting, and drive in your 2 1/2″ exterior pocket hole screws. Repeat this to create two identical short end assemblies. Finally, connect the two ends using the 39″ long aprons.
Pocket hole joinery is incredibly accessible, but understanding the mechanical forces at play is vital for a lasting build. A pocket screw acts primarily as an internal clamp. The true strength of this joint—especially against the racking forces a table experiences when dragged across a patio—relies heavily on the friction between the two mating surfaces and the cross-linking polymers of the wood glue. However, because we are joining end grain (the end of the apron) to long grain (the side of the leg), traditional PVA wood glue is prone to starvation as the porous end grain wicks the moisture away. Sizing the end grain with a dilute glue mixture before the final glue-up can drastically improve bond strength. The aggressive threads of the 2 1/2″ exterior pocket screw tap deep into the dense long grain of the 4×4, creating mechanical resistance against shear loads, keeping your base perfectly square.
Step 3: Installing the Top Supports
With the outer frame assembled, it is time to add structural rigidity. Space the three 18″ center supports evenly along the inside of the 39″ long aprons. These should be flush with the top edge of the aprons. Use wood glue and the pre-drilled pocket holes to secure them in place. These supports will act as the anchor points for the heavy tabletop.
In structural engineering and furniture design, we must account for deflection—the degree to which a structural element is displaced under a load. A 5-foot tabletop spanning an open void will inevitably sag under the dead load of its own weight and the live loads of heavy planters, resting feet, or sudden impacts. By installing cross supports at engineered intervals, we effectively shorten the unsupported span of the 2×6 tabletop boards. Wood is an anisotropic material; its strength properties are highly directional. A 2×4 placed on its edge (the strong axis) resists bending exponentially better than one laid flat. While our aprons handle the primary load transfer to the legs, these internal joists distribute the compressive forces across the entire matrix of the base, preventing the tabletop from bowing downward over time and stiffening the entire undercarriage against lateral torsion.
Step 4: Building the Farmhouse Tabletop
Layout your five 48″ 2×6 boards side-by-side. For an outdoor table, it is crucial not to glue these edge-to-edge. Instead, leave a 1/8″ to 1/4″ gap between each board for water drainage and wood expansion. You can use large nails or spacers to keep the gaps consistent. Once aligned, position the 27 1/2″ breadboard ends perpendicular to the main planks. Attach the breadboards using deck screws driven through the face, countersinking the heads to fill later, or use pocket holes from underneath.
When examining the end grain of your 2×6 boards, you will notice the annular growth rings curving in a specific direction. The wood fibers inherently want to flatten out as they lose moisture, causing the board to cup away from the heartwood (the center of the tree). To mitigate a tabletop that resembles a rolling ocean, alternate the orientation of the end grain: bark-side up, bark-side down, bark-side up. Furthermore, placing this table outdoors introduces massive hydro-fluctuations. Pine can expand by up to 1/4 inch across a 6-inch width during high humidity or rain. By purposefully leaving 1/8″ gaps between the planks, we provide a physical allowance for this tangential swelling. If we were to glue this top into a solid slab without expansion slots, the seasonal hydro-expansion would generate enough outward pressure to blow the apron joints apart or catastrophically split the wood.
Step 5: Attaching the Top to the Base
Center your assembled base upside-down onto the underside of your tabletop. Do not simply drive screws straight through the aprons into the top. Instead, use a drill to bore shallow recesses for Figure-8 fasteners along the inside top edge of the aprons and supports. Secure the fasteners to the base, then drive screws through the other side of the Figure-8 into the underside of the tabletop.
The greatest sin in woodworking is ignoring wood movement, a mistake that results in the catastrophic failure known as cross-grain conflict. The massive 2×6 tabletop boards will expand and contract significantly across their width (perpendicular to the grain) as the seasons change. However, the 39″ longitudinal aprons of the base will experience almost zero movement along their length. If we rigidly screw or glue the top directly to the base, the expanding top will be locked against the static apron. The resulting stress will tear the screws out or crack the tabletop boards straight down the middle. Figure-8 fasteners, or alternatively, elongated slotted holes with pan-head screws, act as a mechanical suspension system. They secure the top firmly against gravity while allowing the fastening point to pivot and slide fractionally, accommodating the inevitable kinetic energy of the expanding and contracting wood fibers without transferring stress to the rigid base frame.
The Heritage Touch
Before you plug in that random orbital sander and fill your shop with airborne dust, take a moment to experience the quiet satisfaction of a sharp hand tool. The modern aesthetic often leaves factory edges sharp, which can be harsh on the hands and prone to splintering outdoors.
Take a well-tuned No. 4 smoothing plane or a simple block plane to the edges of your tabletop. Set the iron for a whisper-thin cut. Run the sole along the sharp arris of the wood, holding the plane at a slight skew. The sound—a clean, distinct shhhh as the blade shears the fibers—is the heartbeat of heritage woodworking. By chamfering the edges by hand, you are not just softening the corners; you are sealing the wood fibers in a way that sandpaper cannot, leaving a burnished, tactile edge that invites the touch and speaks to the craftsmanship imbued in the piece.
Finishing & Protection
Outdoor furniture faces a brutal battle against ultraviolet radiation, standing water, and fluctuating temperatures. Because we are using pine, a softwood notorious for absorbing stain unevenly, your first step must be a high-quality pre-stain wood conditioner. This mitigates the “blotchy” look by temporarily sealing the highly porous springwood.
Once your oil-based stain has cured for at least 24 hours, you must protect the investment. Standard interior polyurethane will crack and peel as the sun’s UV rays break down the wood fibers beneath the finish. Instead, apply a minimum of three coats of an Exterior Spar Urethane. Spar urethane contains a higher ratio of oil to resin, allowing the finish to remain flexible and stretch with the wood’s seasonal movement. It also contains vital UV inhibitors. Sand lightly with 220-grit paper between each coat to achieve a glass-smooth, highly durable barrier.
Frequently Asked Questions
What is the best wood for an outdoor coffee table? While this plan utilizes affordable standard pine or fir for accessibility, the premium choices for outdoor furniture are Cedar, Redwood, White Oak, or Teak. These species possess natural extractives and oils that inherently resist rot, decay, and wood-boring insects. If using pine, applying a robust exterior sealant is absolutely mandatory.
How do I protect an outdoor pine table from rain? Protection starts with the build. Leaving gaps between tabletop boards allows standing water to drain rather than pool. Beyond structural design, thoroughly coating all sides of the wood (including the underside and feet) with an exterior Spar Urethane or a deep-penetrating exterior oil finish creates a hydrophobic barrier against rain and snow.
Do I need to leave a gap between the top boards? Yes. For outdoor furniture, leaving a 1/8″ to 1/4″ gap is highly recommended. Wood is hygroscopic and will swell during humid or rainy seasons. The gaps provide the necessary physical space for the wood to expand without buckling, and they allow water to pass through rather than resting on the surface and degrading the finish.
Final Thoughts & Next Steps
You did it! You took a pile of ordinary lumber and turned it into a functional, beautiful centerpiece for your outdoor living space. Woodworking isn’t about having a million-dollar shop; it is about taking your time, making safe cuts, and enjoying the process of creating something with your own two hands. Don’t stress over a tiny gap or a slightly misaligned screw—those are the hallmarks of a handmade piece, not factory-stamped perfection.
Now that you have mastered the basics of pocket hole joinery and outdoor finishing, your patio is begging for some matching seating. Check out my recommended Woodworking Resource right here: Get Access Here to complete your outdoor oasis. Stay safe, have fun, and go make some sawdust!
References
To deepen your understanding of the concepts discussed in this build, I highly recommend adding these foundational texts to your shop library:
- Understanding Wood Finishing by Bob Flexner – The definitive bible on stains, sealers, and topcoats.
- Understanding Wood: A Craftsman’s Guide to Wood Technology by R. Bruce Hoadley – Essential reading for mastering wood movement, moisture content, and structural properties.
- Woodworking Basics: Mastering the Essentials of Craftsmanship by Peter Korn – A brilliant look into structural integrity and foundational joinery.