| Project Overview | Details |
| Active Time | 3-4 Hours |
| Total Time | 24 Hours (includes glue and finish drying time) |
| Estimated Cost | $30 – $45 |
| Required Tools | Miter Saw, Drill, 1-1/4″ Forstner Bit, Tape Measure, Clamps |
| Difficulty Level | Beginner-Friendly |
Table of Contents
There is an undeniable, quiet magic in taking raw, dimensional lumber and transforming it into something that not only serves a purpose in your home but holds the warmth of your own two hands. Wood has a soul; it brings the grounding energy of the forest straight into our living rooms. If you have been looking for an entry point into woodworking—a project that builds your confidence without requiring a shop full of expensive machinery—you have found it.
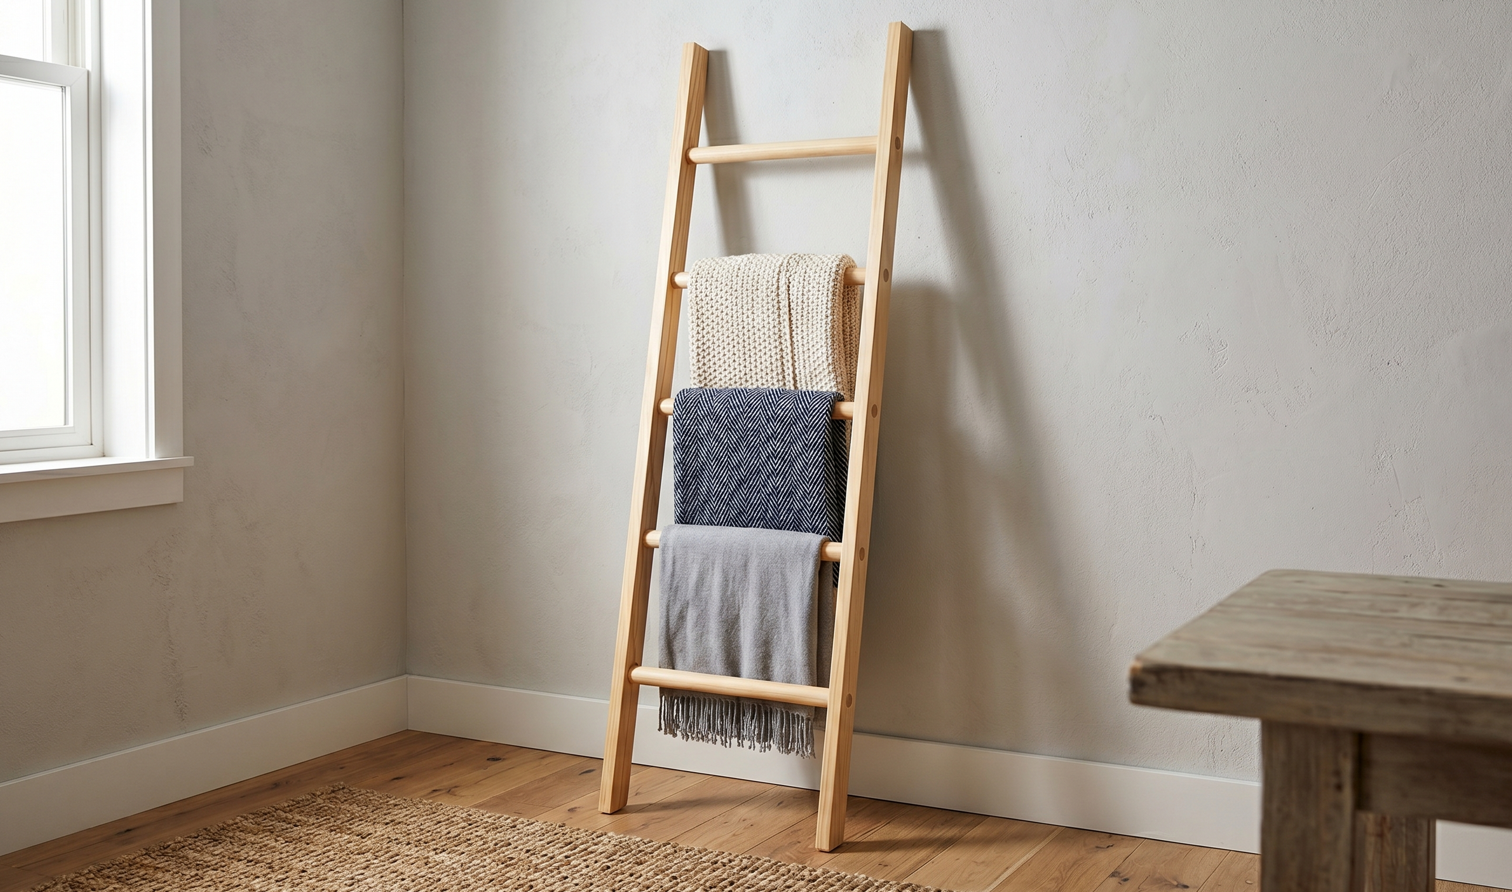
You don’t need to be a master craftsman with decades of experience to create something beautiful this weekend. This minimalist blanket ladder relies on clean lines, simple joinery, and the elegant contrast between flat rails and round wooden dowels. It is the perfect blend of modern design and foundational woodworking techniques. Grab your safety glasses, fire up the saw, and let’s get building.
The Shopping List
Skip the complicated lumberyard runs. Everything you need for this build can be sourced directly from your local big-box home center. Take your time sifting through the bins to find the straightest boards possible.
Materials:
- (2) 1×3 Select Pine or Oak boards, 6 feet long (These will be the vertical rails)
- (4) 1-1/4″ hardwood dowels, 48 inches long (These will be cut down for the rungs)
- (1) Bottle of high-quality wood glue
- (1) Pack of 120-grit and 220-grit sandpaper
- (1) Pre-stain wood conditioner and your choice of stain or clear topcoat
Tools & Hardware:
- Miter Saw or Hand Saw
- Power Drill or Drill Press
- 1-1/4″ Forstner Bit
- Tape Measure and Combination Square
- Minimum of (2) 24-inch or 36-inch Bar Clamps
- Woodworker’s Mallet
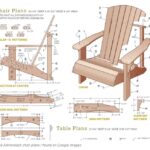
The Cut List
Precision at this stage dictates the success of your final assembly. Remember the golden rule: measure twice, cut once.
- The Vertical Rails: (2) 1×3 boards cut to exactly 72 inches in length.
- The Rungs: (5) 1-1/4″ dowels cut to exactly 18 inches in length.
The Step-by-Step Build
Step 1: Prepping and Cutting the Stock
Begin by inspecting your 1×3 boards. Choose the most visually appealing faces to be the outside of your ladder, and mark the inside faces lightly with a pencil. Use your miter saw to square off one end of each board, then measure down 72 inches and make your final cut. Next, take your 48-inch dowels. Measure and cut five pieces, each exactly 18 inches long. It is crucial that these dowels are identical in length so the ladder pulls together squarely.
Grain Release and Moisture Equilibrium When you purchase dimensional lumber from a big-box store, it has often been kiln-dried rapidly and shrink-wrapped, meaning internal stresses are trapped within the cellulose structure of the wood fibers. As soon as you make a crosscut, you are severing those continuous fibers and releasing pent-up tension. This is why a board that looked perfectly straight in the store might suddenly bow or twist slightly after being cut. Furthermore, the wood immediately begins interacting with the ambient humidity of your workshop, striving for Equilibrium Moisture Content (EMC). By crosscutting your stock and allowing it to rest on a flat surface for 24 hours before assembly, you allow the wood to normalize to its environment. When you use a sharp blade, the tooth geometry—specifically an Alternate Top Bevel (ATB) grind—shears the wood fibers cleanly across the grain rather than ripping them, which minimizes tear-out and leaves a surface that requires less sanding later.
Step 2: Marking the Rung Spacing
Lay your two 72-inch rails side-by-side on your workbench, ensuring the ends are perfectly flush. You want to mark both boards simultaneously to guarantee the rungs will be level. Starting from the bottom, make a pencil mark at 12 inches up. From that 12-inch mark, make subsequent marks every 12 inches until you have five locations identified. Use a combination square to strike a line across the width of both boards at these marks. Find the exact center of the board’s width (for a standard 1×3, which is actually 2.5 inches wide, the center is 1-1/4 inches) and mark an intersecting crosshair.
Reference Faces and Cumulative Error In any woodworking layout, establishing a “reference face” and a “reference edge” is the foundation of accuracy. If you measure each rung location independently starting from the previous mark, you run the risk of introducing cumulative error. For instance, if your pencil line is consistently 1/16th of an inch thick, and you measure from the edge of the line each time, your final rung could be off by nearly 3/8ths of an inch. By pulling your tape measure once from a single, shared baseline (the bottom of the perfectly flushed rails) and marking all increments at 12, 24, 36, 48, and 60 inches, you isolate any minor inaccuracies. The practice of marking both stiles simultaneously while they are clamped or held tightly together ensures that even if a measurement is slightly off from the plan, the opposing holes will be completely symmetrical, preventing the ladder from twisting or racking during the glue-up phase.
Step 3: Drilling the Dowel Holes
With your center marks clearly laid out, it is time to drill the holes that will receive the dowel rungs. You will use a 1-1/4″ Forstner bit. The goal is to drill a “blind hole”—meaning a hole that does not go all the way through the board. Set a piece of tape on your Forstner bit to act as a depth stop, marking exactly 1/2 inch of depth. Place the center spur of the Forstner bit directly on your crosshairs and drill straight down to the tape line. Repeat this for all 10 holes.
The Mechanics of the Forstner Bit Unlike twist drills or spade bits, which tend to wander and tear the surrounding grain, the Forstner bit is engineered for precision joinery. It operates on two distinct physical principles: the scoring rim and the chippers. The razor-sharp outer rim makes first contact with the wood, severing the wood fibers in a perfect circle to prevent splintering and tear-out at the surface. Once the perimeter is established, the radial cutting edges (the chippers) plane away the interior waste, ejecting the wood chips upward. Because we are drilling a blind hole halfway through a 3/4-inch thick board, controlling depth is critical. Leaving exactly 1/4 inch of material on the outside face provides a structural boundary. The flat-bottomed hole created by the Forstner bit maximizes the face-grain to face-grain contact area between the end of the dowel and the bottom of the mortise, which is essential for a high-strength glue bond.
Step 4: Assembly and Gluing
Before applying any glue, perform a dry fit. Insert all five dowels into one rail, then carefully align the second rail on top and tap it down. If everything fits snugly, pull it apart. Apply a thin, even layer of wood glue to the inside of each hole and around the ends of the dowels. Reassemble the ladder. Place your bar clamps across the outside of the rails, centered over the rungs, and apply gentle pressure until the joints close tightly. Use a damp rag to wipe away any glue squeeze-out immediately.
Polymerization and Joint Starvation Wood glue, typically Polyvinyl Acetate (PVA), does not act like tape; it operates on a microscopic, chemical level. The liquid glue wicks into the porous, tubular cell structure of the wood fibers through capillary action. As the water base evaporates and absorbs into the surrounding wood, the acetate polymers cross-link, creating a bond that is physically stronger than the lignin holding the wood itself together. However, managing clamping pressure is a delicate physics equation. If you apply too little pressure, the glue line remains thick, resulting in a weak, flexible joint. If you apply excessive pressure, you risk “starving the joint” by squeezing all the adhesive out of the mortise, leaving nothing behind to bridge the cellular gaps. The ideal pressure brings the wood surfaces into intimate contact—indicated by a consistent, tiny bead of squeeze-out—allowing the polymers to lock the wood fibers together permanently during the 24-hour curing process.
Step 5: Trimming and Sanding the Base
Once the glue has cured overnight, remove the clamps. To ensure the ladder leans elegantly and safely against the wall, you need to cut an angle on the bottom of the feet and the top of the rails. Mark a 10-degree angle on the bottom feet parallel to the floor, and a matching 10-degree angle on the top back edge so it rests flat against the wall. Cut these with your miter saw or a hand saw. Finally, sand the entire piece, starting with 120-grit and finishing with 220-grit.
The Physics of Repose and Abrasive Leveling Leaning a ladder against a wall introduces dynamic shear and compression forces. By cutting a 10-degree bevel on the feet, you drastically increase the surface area contacting the floor. This maximizes friction, shifting the center of gravity downward and inward, thereby altering the ladder’s angle of repose to prevent it from slipping outward under its own weight or the weight of heavy blankets. Regarding the final preparation, sanding is not merely making the wood smooth; it is a process of systematic, progressive mechanical abrasion. The 120-grit aluminum oxide particles act as microscopic chisels, plowing deep furrows into the wood to remove machine marks and glue residue. Stepping up to 220-grit replaces those deep furrows with progressively shallower scratches until they become invisible to the naked eye. Skipping grits forces fine sandpaper to work too hard, leaving deep, localized scratches that will immediately telegraph through and ruin your final finish.
The Heritage Touch: Refining the Edges
While power tools offer speed, there is a distinct lack of soul in an edge left perfectly sharp by a router or a factory mill. To truly elevate this piece and give it the character of heritage furniture, step away from the noise and pick up a sharp block plane.
Clamp your finished ladder securely to your workbench. Set the iron of your block plane for a gossamer-thin shaving. Hold the tool at a slight skew and walk it down the hard, 90-degree corners of your vertical rails. Listen for that satisfying shhhhk sound as the sharp steel slices the fibers, creating a subtle, 45-degree chamfer. This process not only softens the visual weight of the ladder, making it inviting to the touch, but it drastically reduces the likelihood of the edges splintering or denting over years of use. It is these quiet moments of handwork—letting the tool follow the natural runout of the grain—that separate a weekend project from an heirloom.
Finishing & Protection
The finish you choose is the armor that will protect your hard work for generations. Because pine and oak absorb finishes very differently, preparation is key.
If you chose pine and intend to stain it, you must apply a pre-stain wood conditioner first. Pine has varying densities between its earlywood and latewood, which causes pigment to absorb unevenly, resulting in a blotchy, amateur-looking finish. The conditioner acts as a sizing agent, partially sealing the thirsty pores so the stain penetrates uniformly.
For the topcoat, consider a wiping varnish or a water-based polyurethane. Blanket ladders endure constant friction as textiles are dragged across the rungs. A wipe-on polyurethane provides an incredibly durable, hard-wearing resin matrix that cures into a protective film. Apply three very thin coats using a lint-free cotton rag, lightly sanding with 320-grit paper between the second and third coats to knock down any raised dust nibs. The result will be a silky, professional luster.
Frequently Asked Questions
Can I use a blanket ladder as a regular step ladder? No. While the joints in this build are strong, the design relies on blind dowel joinery and 1×3 material. It is engineered to hold the static weight of textiles, not the dynamic load of a human being. Using it to climb could result in joint failure and serious injury.
What is the best wood for a blanket ladder? For beginners, Select Pine is excellent because it is inexpensive, easy to cut, and takes paint beautifully. If you want a natural wood look with higher durability, Red Oak or White Ash are fantastic choices. They are harder, resist denting, and offer striking, porous grain patterns that look incredible under a clear oil finish.
How do you keep a blanket ladder from sliding on hardwood floors? To protect your floors and increase safety, apply adhesive rubber furniture pads to the angled bottoms of the ladder feet. Alternatively, you can purchase liquid rubber grip (often used for tool handles) and paint a thin layer onto the bottom edge. This dramatically increases the coefficient of friction, ensuring the ladder stays firmly rooted against the wall.
Final Thoughts & Next Steps
You did it! You took raw materials, applied a bit of math, a lot of heart, and built something functional and gorgeous for your home. Woodworking doesn’t have to be intimidating. It is just about taking things one step at a time, making some sawdust, and learning as you go. Be proud of those slight imperfections; they are the maker’s mark that proves this wasn’t stamped out in a factory overseas.
Now that you’ve mastered blind dowel joinery, why stop here? Your shop is set up, your tools are out, and you have the skills. Keep that momentum going! Check out our [LINK TO RELATED PROJECT: How to Build a Modern Slatted Entryway Bench] to pair perfectly with your new blanket ladder. Get back in the shop, stay safe, and keep building! Check out my recommended Woodworking Resource right here: Get Access Here
References
For further reading and to deepen your understanding of the principles discussed in this build, consider exploring these foundational texts:
- Tage Frid Teaches Woodworking (Vol. 1: Joinery) by Tage Frid – An essential masterclass in structural wood joints and tool application.
- Understanding Wood: A Craftsman’s Guide to Wood Technology by R. Bruce Hoadley – The definitive guide to wood movement, moisture content, and cellular structure.
- Understanding Wood Finishing by Bob Flexner – The ultimate resource demystifying the chemistry and application of stains, oils, and film-building finishes.